CLICK HERE FOR FREE BLOGGER TEMPLATES, LINK BUTTONS AND MORE! »

Friday, November 2, 2012

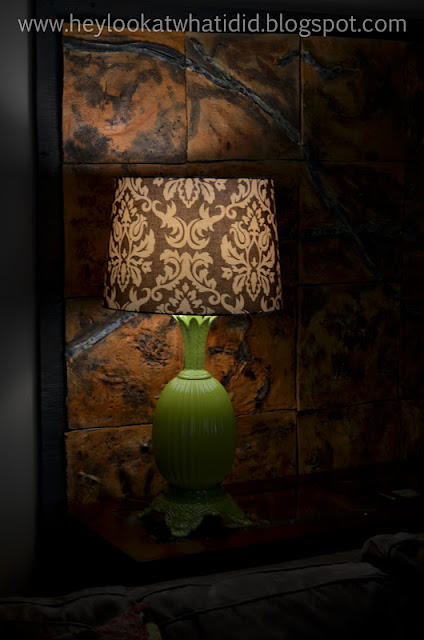
This Little Light of Mine... a thrift store lamp redo

Earlier this week I went to a local thrift store to look for something to use for my own last minute halloween costume, on the way in the door I saw this lamp. It was still on the porch, hadn't even been brought in to be checked over or priced. I've been wanting to try spray painting a lamp, so when I found out that it worked & was only $5, I bought it.


I had to wipe off all of the dust and then took off the shade & harp (I wouldn't be re-purposing these... at least not for this lamp). I used some masking tape to cover up the top where I didn't want it painted. 


 Then I was able to tuck the whole cord up into lamp to prevent it from being painted on (otherwise I'd have put it in a plastic bag & used tape to keep it from being painted  too).
This was when I noticed for the first time that there is an extra socket to make the base of the lamp light up too... however I'm pretty sure that this additional light would make the marks from being spray painted more visible so I'm not going to try it ... or hunt down an extra night light bulb to try it, well at least for now). ;) 


I feel like the lamp had some pretty details on it. 

 Then it was time to paint. This was after 1 coat of paint. I ended up using the whole can. :)


Here it is in our living room on the sofa table behind the couch.  I found a cute lampshade at Wal-Mart for $12 (this was perfect - ended up being cheaper than buying a new plain on and recovering with fabric).


 The paint didn't completely cover the brass on the top & bottom of the lamp, but that's ok. I probably would've bought some sort of antiquing glaze to give it that look on the metal parts anyway. :)


I'm super happy with the results. And can't wait to do my next one... I just need to decide on the color. 

Thursday, November 1, 2012

How I salvaged my floor register vent covers... for $7

Do your register covers look like this? Or worse (some of ours did)...
This is how I took care of the problem for $7!
 
We have lived in our house for about 2.5 years now. During that entire time the register covers for the floor vents have always bothered me. In the master bedroom they were pink (yes pink!) even though the carpet had been replaced with a neutral tan, next to doors they had scratches & rust, and the kitchen ones were even nasty brass (but rusty in spots)... 
Needless to say I've always wanted to replace them... but well every time I'd go to Home Depot & start loading up my shopping cart with new ones (even the boring tan metal ones) the cost would add up so fast. For our main floor alone I need 11! And when I wanted the ones that were atleast $15, well now you know why 2.5 years later I still had gross/blah looking register covers. ;)

 Then other day on pinterest I saw a pin that described how the person used spray paint to clean theirs up. And I thought to myself, "WOW! What a great idea, I need to do that." Then today while at Home Depot I found some Rust-Oleum Universal Hammered spray paint, that is the Dark Bronze color with a Hammered effect. OMG! I love this stuff! It was on sale for $6.97 and I only bought 1 can, but now I need more because I was only able to get 7 covers done and I still need to finish the other 5. 

All I did was pull mine out, was them off (then vacuum out the vents -eeewww it was gross... just one of those tasks I never really think to tackle), layed them out on newspaper & started spraying. It dried fairly quickly between coats and I love the texture that the Rust-Oleum "Hammered" gives.
Now for some before & after pictures


The  Dark Bronze cover is finished and the other 2 are prior to being painted. 
See the little bit of texture? I like it!
 
Upclose a finished cover vs the rust, chipped finish cover. Ick! Wasn't that gross?


Sooo much better! Thank you Rust-Oleum!!

And I realize that it's going to cost me another $7 to do the rest of the register covers on the first floor, but hey $14 total to get all 11 done is a heck of a lot better than the $170 I was looking at to replace them all!

I've been having LOTS of fun around here with chalk paint & spray paint, so keep an eye out for a few more posts soon! Tomorrow I'll be ready to post about my "new" thrift store lamp project and consignment store sewing table!


Sunday, September 16, 2012

Time to cowboy up!


well ok, not really...

We were recently invited to a good friend's little boys 3rd birthday. My friend goes all out with her parties for his birthday, seriously she does amazing parties for him. Like everything that I see on Pinterest/Etsy and love, but am too cheap or lazy to get around to doing it (b/c I tend to procrastinate on these things) she does. And they are big parties too, not just 6 or 7 little kids. My hat's off to you (well I guess her hat, since as part of the party we brought home 3 straw cowboy hats). ;) Great party! Maybe next year I'll you plan my kids birthdays!

But I digress...

I new that she was going to go all out for the theme of the party so I wanted to have something fun & theme appropriate for my daughter to wear.  I've also been waiting for the right inspiration to make a horse themed set for her, but didn't want to make something that would only get worn for 1 or 2 times. I'm so glad that I waited. I had the 2 Joel Dewberry fabrics since last winter, but only recently found a pony print fabric that I liked at a local quilt shop.

For my skirt pattern I used the free tutorial from Dana Made It (link here) luckily her measurements were the same as what I'd need for a 2/3. I made a couple of changes though- I didn't add pockets this time, but might some other time and I just serged the bottom layer and left it plain (didn't turn up the hem). I liked it like this and frankly it was easier (there I said it)... sometimes finishing the hem can be the reason I don't finish a project (just ask the almost completed reversible jumper dress hanging in my basement!)

Well enough chatter, here's the finished result...


See I love it so much I had to put 3 almost identical pictures on here :)

Foofa? What's a Foofa?

I had a friend contact me in early July about making a Foofa shirt for her daughter's 2nd birthday party. I was like "uh, what's a Foofa?" ... Apparently there is at least 1 toddler show that my kids have never managed to watch often enough for me to know that Foofa is a character from Nick Jr's show,  Yo-Gaba-Gaba.


Well, okay then. Yes I can make one of these. I think, I hope, I tried it. It turned out pretty cute. My own daughter 2 year old daughter certainly loved it & wanted it when she found me hand sewing on the little eyelashes. ;) 

Friday, September 7, 2012

Now on Facebook!


A couple of weeks ago I started a facebook page because I'd begun getting quite a few requests for shirts via my personal page. So now this way I hope its easier to keep up with what I've been making or to order. I still plan on doing my blog though, because I'll still like to share not only my sewing but other crafty type projects as I get them done around here. :)

Here is the link to my facebook page! Please feel free to Like it & share with your friends. :) Or just click on the logo image above. https://www.facebook.com/HeyLookCustomDesignsByRosie

Tuesday, July 3, 2012

More Ninjagos

I had another order for Ninjago shirts... this time they got shipped off to Canada yesterday! Kinda makes me feel all warm & fuzzy inside to think I have international customers. :) Kai and Jay shirts for one lucky boy!

Monday, July 2, 2012

A rockin' first birthday


A family that is very special to us has  little girl who turns 1 today. She needed this for one of her birthday parties. :)  She wore this with a red ruffled diaper cover and was just adorable.