CLICK HERE FOR FREE BLOGGER TEMPLATES, LINK BUTTONS AND MORE! »

Thursday, November 3, 2011

A pleated tote bag

One of my oldest & dearest friends had her birthday last week. I've known for a while that I wanted to make her something for it. It was just a matter of deciding what. Well a few weeks ago I came across this great fabric at a fabric store - Pat Bravo's Hyperreal Garden collection for Art Gallery fabrics and I knew I wanted to use it. 
1 Yard of Lush Foliage Plum Cotton Fabric from the Pat Bravo Hyperreal Garden Collection for Art Gallery Fabric HG8401


I also had some great Joel Dewberry fabric to use for the contrasting parts. 
Fabric Joel Dewberry - AVIARY 2 -Lodge Lattice in Lilac JD46  - Free Spirit Fabric - 1 Yard Cut

After doing a search on Pinterest I found a really nice little tutorial for a Pleated Tote (or beach bag) from the blog Thimble Things I Make & Do - you can find it by clicking the name. :) Thanks so much for sharing your idea and writing directions! 


I made a few mistakes that I hope not to repeat again, but I hope that she'll appreciate the labor of love that this simple little tote was, I had previously never pleated fabric or used interfacing so those were learning experience. 

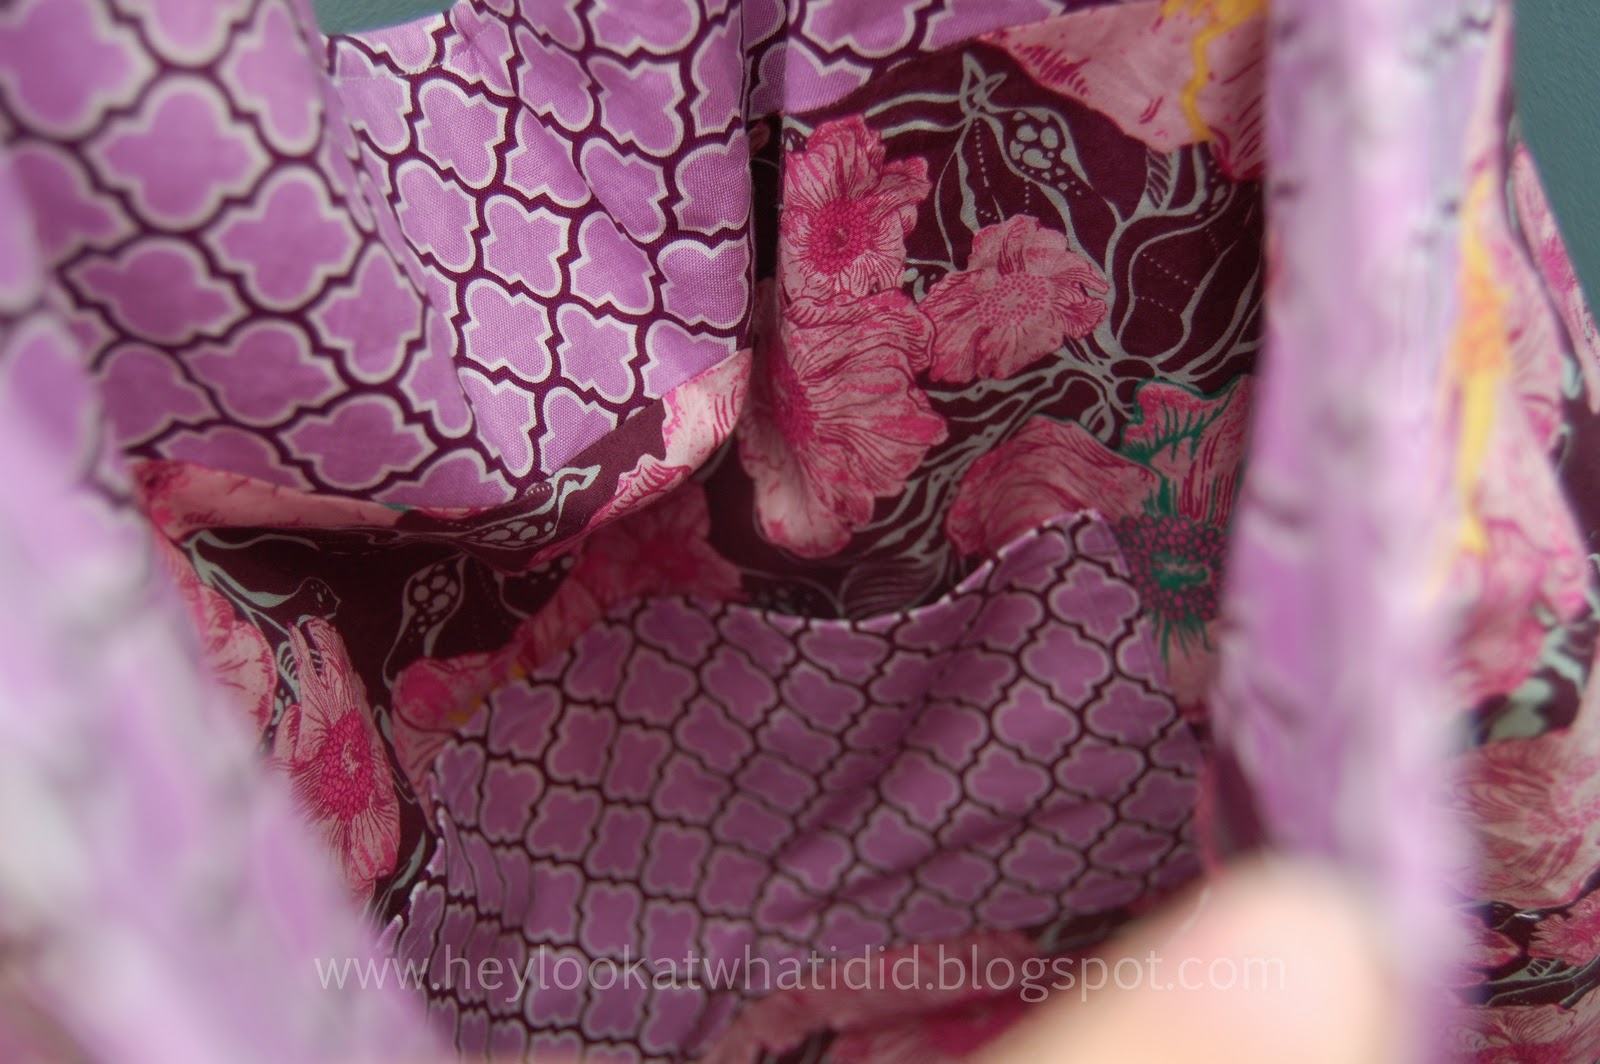
I did add a double pocket to the inside of the bag for cell phone/keys/lip gloss... in the tutorial she had an option for a zippered pouch but I like this a bit better - since I almost always leave those open. 

I can't wait to do my next one now! 

Tuesday, November 1, 2011

Bathroom redecorated for girls & boys...

When we bought our new house last year I was amazed to find that the kids bathroom was painted almost the same exact bright green as their bathroom at our old house. I was tired of it. I new I wanted something fun for the kids, but its so hard to find bathroom themes for girls & boys that is not fish, ducks or ocean... and none of those appealed to me really.

So after hours (seriously) of searching online for something cute, I finally headed over etsy to look for some fabric to make something myself.  I found this adorable set of owl fabrics by Moda - Its a Hoot by MoMo. I thought that the combination of blues, greens, pinks, etc. would work well for my daughter & sons. Plus its modern & funky enough to be nice looking for a guest bathroom too.
Moda It's A Hoot 10'' Layer Cake By The Each
I toyed with the idea of making the entire shower curtain myself. But then when I realized I'd need yards of fabric to do it and that I wanted to have some coordinating fabrics to do some other projects with. So this is what I came up with. I apologize that I can't make this into a tutorial to show how to make the shower curtain or some of the other projects, but this was done over the summer before I wanted to do this blog. :)

For the shower curtain I bought a plain shower curtain at TJ Maxx, then I added 2.5 yards of fabric (divided) + another Quarter yard of fabric in the dots

Photobucket

I used Mod Podge to adhere fabric to the light switch & outlet covers. It took just a little bit of time & fabric. :) Seriously it was fast - just had to let them dry between coats of Mod Podge. I loved Mod Podge during this project - but for what it is its not worth buying it at the store! Another fun little mod podge project was taking 3 of the $0.99 wooden plaques found in the craft section at WalMart and putting fabric on them, then I screwed robe hooks into each of them to use to hang the kids towels on - there's no other way to hang up towels for 3 kids in there. ;) We added a new towel bar for guest towels too. I found this recipe for how to make your own on Pinterest - click HERE to find the recipe & save yourself some $ to apply towards your next project. I know I will!

Photobucket Photobucket

Photobucket
I found this cute inexpensive light fixture and mirror at Home Depot. When I took down the ugly builders special bar of light bulbs light fixture and medicine cabinet I found that the medicine cabinet was literally screwed into the wall covering up a giant hole in the drywall and that the light fixture was cut horribly too. So I had to enlist my husband in my simple little remodel that I was supposed to handle on my own. Both of these items were under $50/each at Home Depot too!


While shopping at Pier1 recently I found a great set of Owl wall decals there were 8 owls, 4 branches & tons of leaves and it was cheap! Plus they are movable so if I made a mistake when putting them up I could fix it (easier than vinyl wall decals & lots cheaper too!).
Owls & Trees Wall Applique
Photobucket

Photobucket
Luckily the vanity, counter, hardware & faucet had all been updated before we bought the house so we didn't have to buy that. I just bought a kit with a towel bar, hand towel bar, and toilet paper holder to update all of those fixtures.


A few tips on the shower curtain:
Here is just an extra up close shot of the shower curtain. I pretty much cut it in half, then sewed the two halves together - creating a seam down the middle of the shower curtain, then I cut a long strip off of that about 6 inches to make the band at the top too. I did the same with the green dot fabric. I actually attached the fabric to the middle of the curtain & then folded it over on the edges to make some clean hems, but in an effort to make the shower curtain a tad longer & also to get rid of the bunching that kept occurring because I wasn't using any type of fusible interfacing I left the bottom hemmed, but did not sew the fabric to the shower curtain. Did that make sense? If you would like to attempt this & need help either leave a comment or contact me! I'm happy to help!
Photobucket

I still want to add a few pictures/photos to the room and use my extra fabrics to dress up some plain towels, but those projects can wait for now!
Witches Legs Front Door Mat

I am going to start this post by saying sorry I didn't get around to posting this before Halloween, I was busy making more tote bags & Halloween applique shirts for Gabby (my daughter).

I saw a really cute pin on Pinterest last month had witches legs on a front porch from a welcome mat. When I tried to click on it, it only went to google, so I decided to make my own Witches Legs Welcome Mat. I was able to do it cheaply too! Since I got the Halloween mat at Carson's for 75% off ($6!!) and the tights from Wal-Mart for $2.50 and everything else we already had at home (though if you don't have a pool noodle they are only like $1-$3).

Supplies
1 pool noodle
1 Halloween Welcome Mat
1 pair of striped tights (I used girls size so they weren't too long)
1 pair of my black high heels
10-12 plastic shopping bags

How To:
Photobucket
1. Cut the noodle in half with a knife

Photobucket
2. Stuff the shopping bags into the feet of the tights (this way you can put them into the shoes, the noodles don't bend well enough to put them into shoes).

Photobucket
3. Put the shoes on the feet of the tights.

Photobucket
4.  Put the noodles into the legs of the tights.

Photobucket

Photobucket
6. Take it all outside to your porch lay the tights & shoes down & then put the welcome mat over the the top of the tights. :) EASY isn't it!?

Photobucket Photobucket

So now that Halloween is over run out to the seasonal clearance sales & get some tights & a Halloween rug to save for next year!!

We had lots of trick-or-treaters that really loved it, some of the younger ones kept staring trying to figure out where the rest of the witch was. ;)

What fun, new Halloween decorations did you try this year?

Friday, October 21, 2011

He Cooks, She Cooks

Ok this is NOT something that I did. But I just learned tonight that chef/owner of the restaurant that my brother works for has a reality TV show with his wife. David is the chef/owner of the restaurant he works at and then Suzanne who owns a few other amazing restaurants here in Los Angeles.

I think the show sounds really interesting. I have to go check & see if we get the Cooking Channel... if not I hope they list the full episodes online.

 
presents
Suzanne & David give us a behind the scenes look as
they prepare for and host a benefit for the Hollywood Farmers Market.
Follow along as they travel and discover the source of their menus and as
they challenge one another to create different dishes using the same ingredients.


P.S. I asked Johnny if he'd be on the show & he said that he didn't work there then. I'm sure you were wondering about it too. ;)

Super Bags for Super Boys

My boys are OBSESSED with superheros! OBSESSED! So of course they wanted to be superhero's for Halloween. I wish I could have convinced them to be something cute or unique... or at least coordinate... but nope, not this year.

Dominic was adamant that he be the Green Lantern and Vincent insisted on being Batman. Not even Batman & Robin for mom. ;) But I did decide after watching them collect various items and tote them around in plastic shopping bags that I could at least make them some treat bags for Halloween. As I posted before when I made the Lalaloopsy bag - the Batman bag was my first ever. I don't have a pattern or even really measurements, I just start cutting & sewing. It seems to work because each one seems to get better... in my opinion anyway.

After I mentioned to some friends that I was doing these for my superhero's a good friend asked if I would make some for her 2 boys that are also dressing up as superhero's too. I was happy to, I am so pleased with how they've turned out. What do you think of them?

My boys love theirs & will be taking them to the EIU Homecoming Parade tomorrow to collect candy in. Dominic has taken his to school everyday this week instead of a book bag. I'm just thrilled that he's so happy with something that I made him!


 Perfect for taking along your favorite superhero book (Superhero ABC's)


*the action figures/masks are only props ;)

I've decided that once I am caught up on a few more projects for my family I'm going to make more of these to put up on Etsy. Stay tuned!

I think these are perfect to include with a book or toy like I have done above.

Ghost's in a snap & on a dime!


Last year at this time I was looking for a quick & cheap Halloween decoration to put out on the porch. I came up with this idea. Since I actually made these last year. I don't have pictures of all the items or every step but I've tried to improvise for you! :) I used Wal-Mart plastic shopping bags for 2 reasons 1) I have tons of them & 2) they couldn't get ruined by rain hanging outside.
There is NO sewing in this project! Don't be scared to try it. :)

Materials needed: (to make 6 - you can easily make more or less)
1 twin size (or larger if you have it) white flat bed sheet (fitted would work too)
2-wooden dowel rods cut into 6 or more pieces (depending on how many ghosts you are making)
1 black Sharpie marker
Clear fishing line
Scissors
6 white zip ties
Hot Glue & Hot Glue gun
1 Sewing needle
30 Wal-Mart or white shopping bags (finally a use for them!)- about 5 for each ghost

 Steps:
1.) Cut your sheet into 6 squares or rectangles - I didn't really measure it out, just tried to make them as equal as possible. I did not sew the edges or anything - I'll just say I think the rough edges add character & that you don't even notice from afar.


2. Take 4 or 5 shopping bags & form a ball, then put that ball inside of the final bag. Leave the handles hanging so that you can tie them around the dowel rod.


 3. Place a piece of the white sheet over the "ball of bags" and secure in place with a zip tie (this is a quick & easy way to secure it - if you don't have zip ties then I am sure you could tie it w/ more fishing line or something.


 4. Using the handles of the shopping bag tie the ball/sheet to the dowel rod (knot it several times tightly).


5. Run a bead of hot glue down the edges of the dowel rod & press the sheet down over it - this way it stays in place while flying outside in the wind.


 6. Draw faces on with your Sharpie marker - happy or mad - whatever you want. The sharpie does not bleed or fade away if out in rain.


7. Thread the needle with fishing line & then push it through the top of the ghost head. Its kind of hard to do because the fishing line is stronger & thicker than thread so you might need to press it on the table or something.


8. Tie a few knots to make the fishing line a loop then run outside & hang them up!


This is all the shelter from the weather that mine had last year & look cute enough still to put them up again. :) I thought briefly about ironing the wrinkles from being packed away ... and then I decided I'd rather blog about it instead!

Wednesday, October 19, 2011

Shop is open!

I did it! I actually opened up a shop this afternoon & listed the Lovely Laundry prints for sale. Earlier today I did sell some to a sweet mama from a message board I am on.  Now I'll just have to wait & see if these will ever sell again.

Just click on the image below to go to my new shop!


Pretty soon I hope to add some tote bags to my inventory. I just have to finish up a few for a friend here & Gabby's Halloween costume. Crossing my fingers.

What do you think of the logo & name? I thought this way it would tie in w/ the blog & not limit me to 1 type of item (just for girls or something).

Thanks for checking in!

If I get a good response I might try offering a blog reader discount code or something. :) Just thinking out loud.